We all know that learning software can sometimes be a little intimidating. Whether you are a new user in the KeldairHR Applicant Tracking System (ATS) or an existing user in need of a refresher, our Fast Start User’s Guide is here to help! We’ve put all of the answers to your basic recruitment software questions in one location with convenient links to find out more.
In the following article, you will receive a complete overview of what will be the most important features for any user or hiring manager in the system. The Fast Start User’s Guide will break down your system into these main areas:
System Login
From the KeldairHR website, select Login in the upper right corner or visit https://login.keldair.com/. After registering, enter your login credentials to access your hiring system. If you have forgotten your password, click the Forgot Password? button to receive an email with a password reset link.

System Notifications
A user can elect to receive system notifications by email for their assigned jobs when triggered by a notification event. System notifications are a user preference setting that must be made by each individual user. By default, most applicant notifications for new users will be turned on.
Read more about the user notifications listed below and how to change your notification preferences.
Job Notifications
- Applicant Message Notifications (Default: On)
- Newest Applicant Notifications (Default: On)
- Part 2 Completion Notifications (Default: On)
- References Notifications (Default: Off)
Messages
- @mentions Notifications (Default: On)
- External Comments Notifications (Default: On)
Integration Updates
- Background Checks (Default: Off)
System Notifications
- Interview Confirmation Notifications (Default: ADD)
- Dashboard Notifications (Default: ADD)
- Default System Notifications (Default: ADD)
Onboarding Notifications
- Onboarding Complete (Default: Off)
- New Hire Completion (Default: Off)
Your Career Site
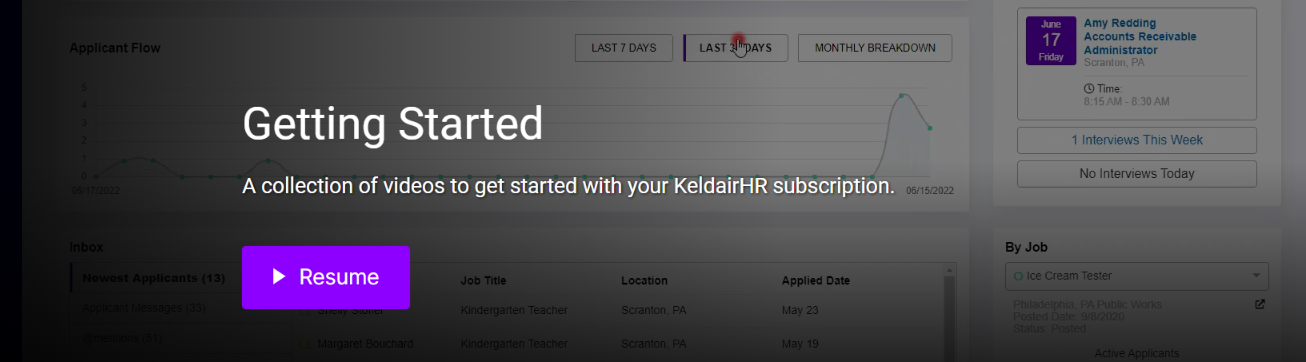
The Career Site provided by your KeldairHR applicant tracking system will publicly display your organization's posted jobs. After logging in to your hiring system, a direct link to your Career Site can be found by clicking on your name in the upper right corner and selecting Open Career Site. The Career Site will open in a new browser tab.
Navigation Tabs
Understanding your hiring system's navigation will increase efficiency and help you find what you need.
- Home - Hiring system dashboard that provides a full overview of what is happening in your hiring system for the applicants and jobs to which you are assigned.
- Jobs - Displays a summary of job metrics and links for active jobs that are currently assigned to you and/or your organization.
- Talent - Shows all applicants who have applied to your jobs.
- Message Templates - Library of all your message templates.
- Reports - Allows you to generate reports based on your system.
- Job Templates - Allows you to create and view job templates.
- Admin - Allows you to customize your system settings.
The Applicant Queue
The Applicant Queue is a breakdown for recruiting activity on a position basis. You can see who applied to a position and from where applicants are being referred, generate Tracking Links, and see who is part of the Hiring Team. Click on a job title from your Jobs tab to access the Applicant Queue.
See more about The Applicant Queue.
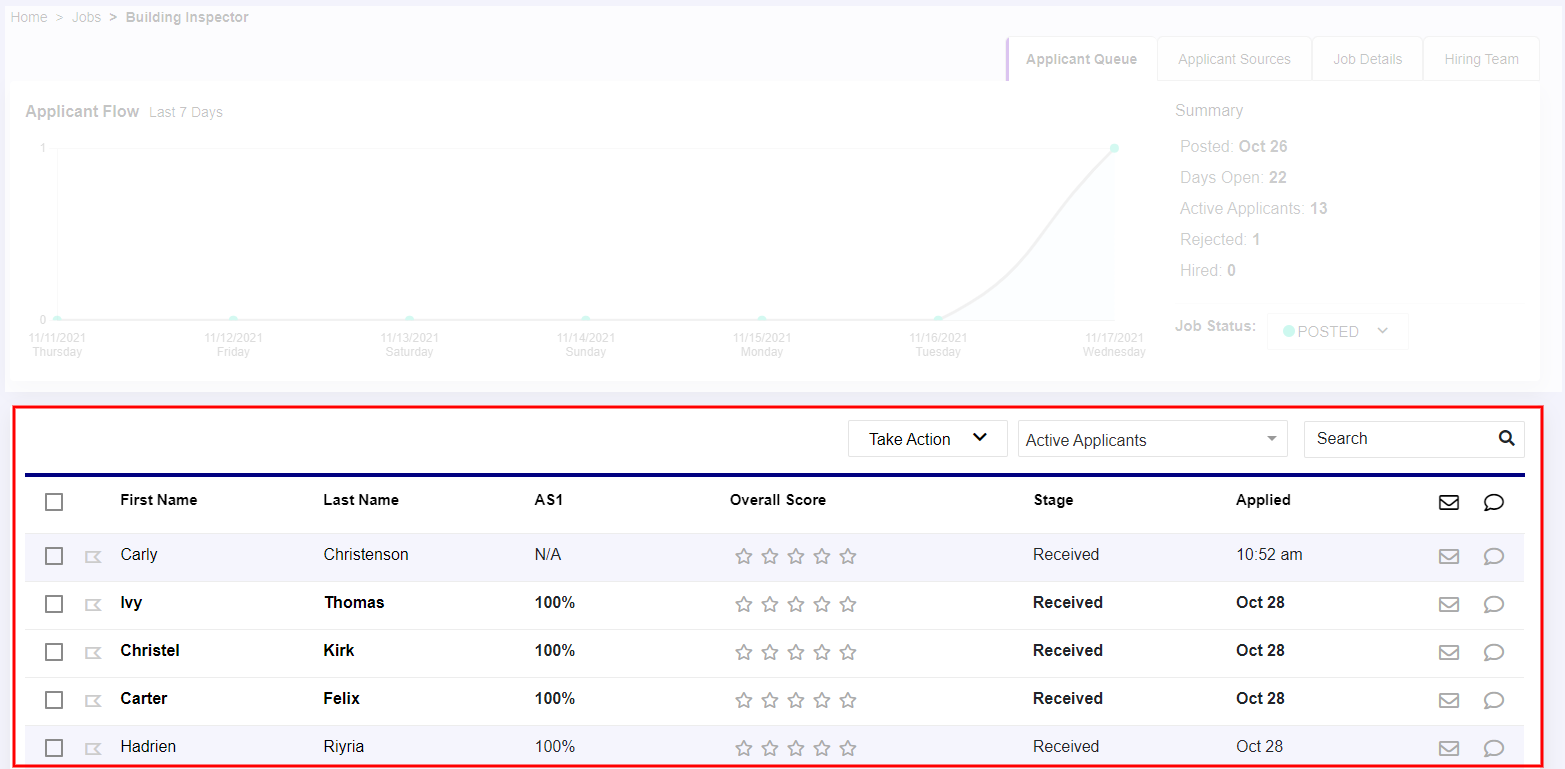
The Applicant Queue: Applicants
The Applicant Queue will show all applicants who have applied to the position. Clicking on an applicant’s name will open their applicant file for review.
-
New applicants will show with a bolded name.
-
Applicants that have been previously reviewed will be indicated by plain text and a muted gray background.
See more about Visual cues to recognize an applicant's status.
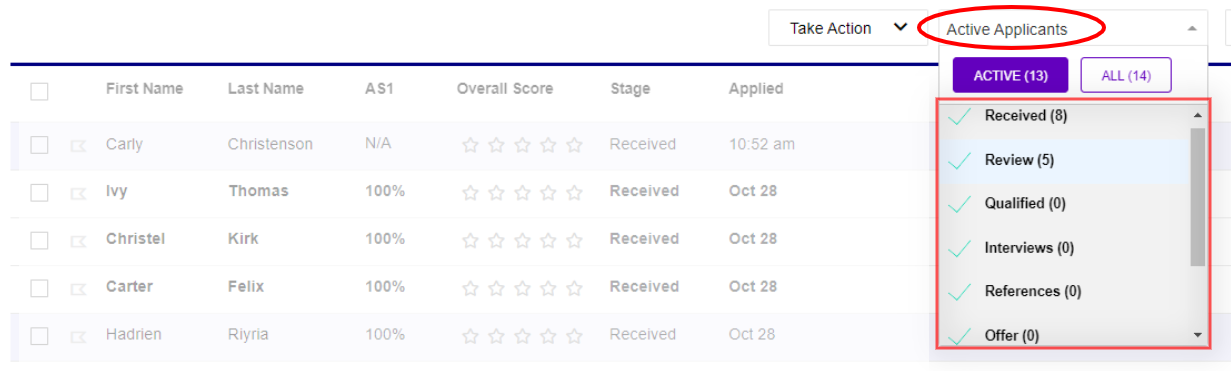
The Applicant Queue: Filtering
The “Active Applicant Filter” allows you to sort applicants by which Stage(s) of your hiring process they are in. You can also toggle to display “All” or “Active” applicants.
-
All: Applicants that are new, currently undergoing recruiting, or have been hired or rejected.
-
Active: Those who are new or currently undergoing recruiting (excludes hired and rejected applicants).
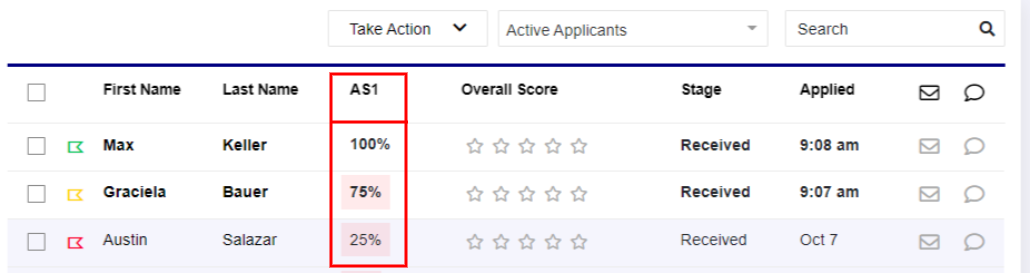
The Applicant Queue: Scores
Before accessing an applicant’s file, you can see how he or she scored in your auto-scored question sets if included as part of your job template. Click on an applicant’s name to view his or her application.
See more about AutoScored Question Sets in the Applicant Queue and Overall Score in an Applicant File.
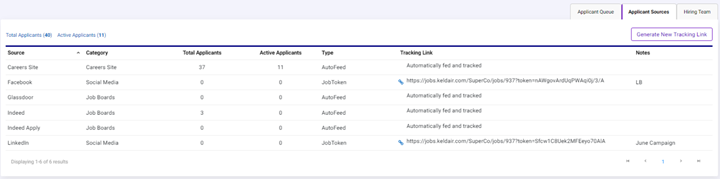
The Applicant Queue: Tracking Links
Tracking links can be used if you would like to post a position to an applicant source to which the system doesn’t automatically feed, such as niche job boards or social media networks. Tracking Links can be generated by clicking on “Generate New Tracking Link” in the top right corner. Once the Tracking Link is generated, you can copy and paste the link in the outlet where you’d like to advertise.
-
The KeldairHR ATS automatically feeds to activated sources including: Indeed, Indeed Apply, Glassdoor, Google Jobs, LinkedIn, Monster, ZipRecruiter, and your company career page.
See more about Generating Applicant Source Tracking Links.
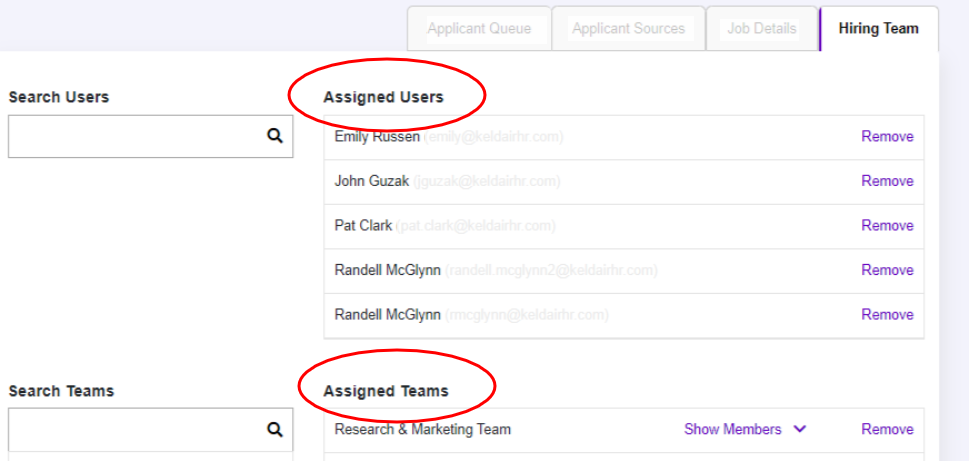
The Applicant Queue: The Hiring Team
The Hiring Team tab shows system users and teams that have access to the job that you are reviewing. Account Administrators and other system users can communicate with assigned users in applicant files of this job with @mentions.
-
Assigned Users are those who are already on the Hiring Team.
- Assigned Teams are groups of users who are on the Hiring Team.
Add individual users to the Hiring Team by clicking in the "Search Users" textbox and then selecting the user from the drop-down and/or add a group of users by clicking in the "Search Teams” textbox and then selecting the group from the drop-down.
See more about The Hiring Team: Assigning Users Jobs.
The Applicant File
Opening an applicant file by selecting an applicant from the Talent tab or an Applicant Queue lets you review the information that they submitted when applying to your job. The profile information and source is listed at the top, the information that was provided is within the left navigation, and communication tools and tracking are along the right side.
See more about The Applicant File.
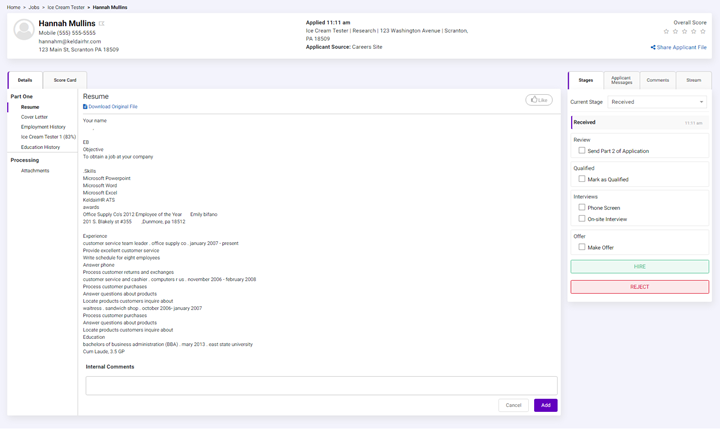
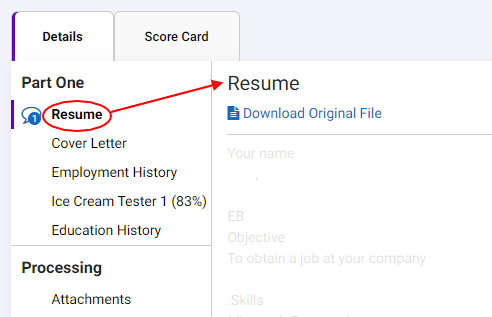
The Applicant File: Sections
When a job seeker applies, a new Applicant File will be created for them, which can contain sections in the Details tab including Part One, Part Two, or Processing.
- Clicking on the various element titles within each section such as “Resume,” "Cover Letter," or “Employment History” will display the information in the center window.
-
Depending on how the job template was set up and which workflow was assigned, the elements in each section of the application can vary.
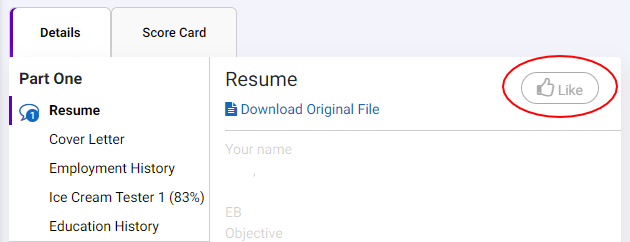
The Applicant File: Rating Applications
When reviewing the elements within each section of an applicant file, you can provide a thumbs up, thumbs down, or neutral score to each if desired.
-
A breakdown of how the applicant scored in each section can be found under the “Score Card.”
-
Hiring can become collaborative if multiple members of the Hiring Team score sections.
-
If a job template was set up to incorporate pre-scored questions, a score will be provided when the applicant submits his or her application.
See more about Rating Applications.
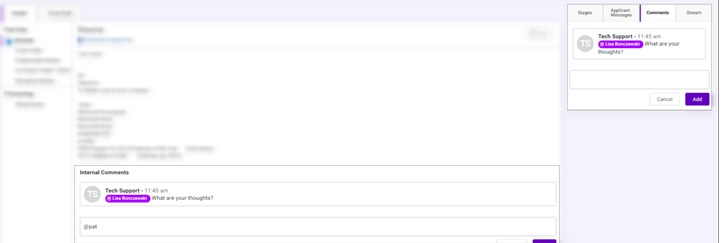
The Applicant File: @mentions
At the bottom of each element, you can @message members of your Hiring Team by typing an “@” and the person’s name with whom you’d like to communicate. The comment that was made will show in the specific area of the applicant file in which it was created and will be logged in the “Comments” section as well.
See more about collaborating with the hiring team using @mentions.
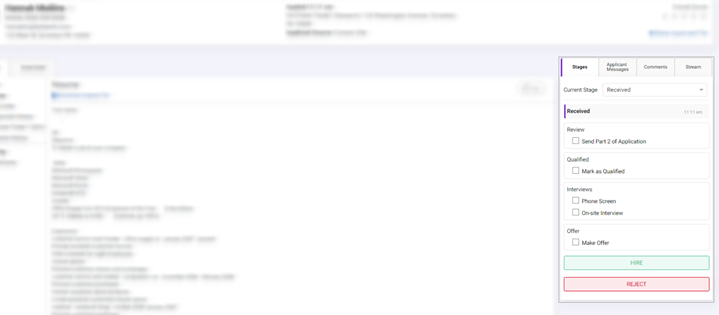
The Applicant File: Workflow Stages
The Stages tab will provide the Stages and Steps of the workflow assigned to the job. The workflow ensures that each applicant file for a job posting will be identical, which lets you use this as a guide for what actions should be taken in your recruiting process.
-
If you are not interested in an applicant, you do not have to click through all of the Stages and Steps; you can click “Reject” at any point.
-
As Steps are initiated throughout the workflow, the applicant will be moved to the corresponding Stage automatically.
-
Some Steps, like “Phone Screen” or “Send Part 2 of Application,” have actions that occur when they are clicked.
-
Click on the Step name text to take the action.
-
Once the actions are taken, you will see a “Part 2” and “Action” header to the right that will give you additional information.
-
-
Depending on how your Workflow was set up, the order and amount of Steps can vary. When all actions within a Step have been completed, the Step will show a green checkmark. If any items are still outstanding, such as waiting for the applicant to return Part 2, the Step will show an orange checkmark.
-
At the end of your recruiting cycle, the most important thing to remember is to click “Hire” or “Reject” in the applicant file. This information will populate reports and ensure clean records.
See more about Workflows.
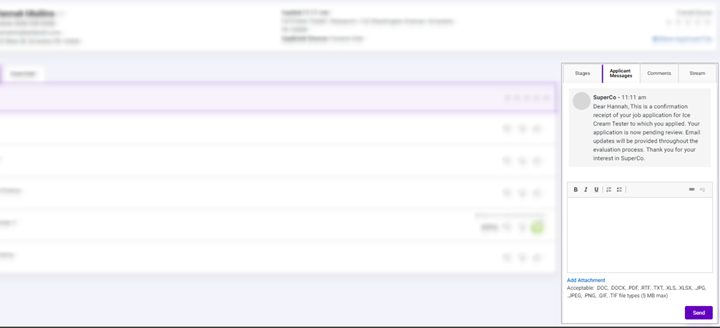
The Applicant File: Applicant Messages
The Applicant Messages tab allows you to communicate directly with the applicant without leaving the applicant file.
-
This is beneficial to use so that all communications are stored in one place and the various members of the Hiring Team can see all communications with an applicant. It also eliminates the need to search through the sent folder for emails.
-
You can type out your message and then click “Send.”
-
Files can be attached by clicking “Add Attachment.”
-
Applicants will receive an email with a link to the message.
-
The applicant can then reply back to the message to engage with the Hiring Team representative.
-
See more about the Applicant Messages within the Applicant File.
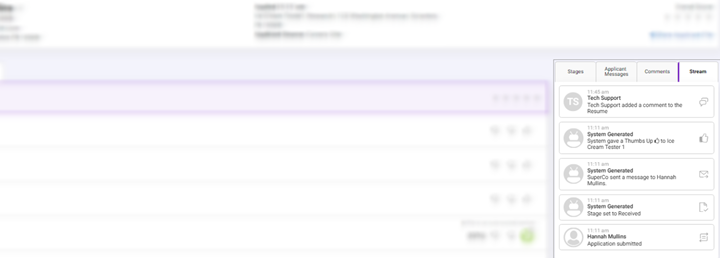
The Applicant File: Streams
The Streams tab in an applicant file records and displays all actions that have been taken in the file and which member of the hiring team has communicated with the applicant.
See more about the Applicant File Streams.
Processing Applicants
Ideally, applicants of the same job should be processed using the assigned workflow. The following related articles will help you with processing applicants at the various Stages and Steps of your hiring process: